Of all the calls we get, slab leaks cause the most anxiety before we've even arrived, because most homeowners' only mental image is a jackhammer and a destroyed living room. That's usually not how it goes. A slab leak is a water line that's failed somewhere under the concrete foundation, and locating it precisely, before anyone touches the floor, is most of the job. Here's what's actually under a lot of Ventura County slabs, why it fails, how we find the exact spot without guessing, and what repair actually costs once we know where to cut.
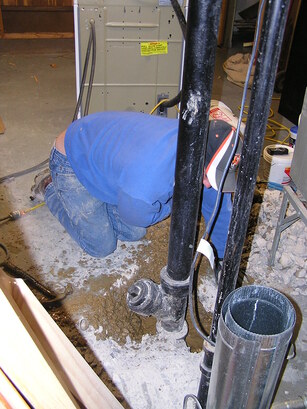
What's actually under the slab, and why it fails
Slab-on-grade construction, where the home's foundation is a single poured concrete pad with the plumbing run directly beneath or embedded within it, was the dominant building method across much of the county from the 1960s through the 1980s. Neighborhoods like East Ventura, the College Area, Montalvo, and Saticoy are largely built this way, and so are large tracts in Camarillo and Thousand Oaks from the same construction era. The supply lines in those slabs are almost always copper, typically Type L, run in long straight sections with soldered joints at every turn and fixture connection.
Copper is a good plumbing material, but it isn't immune to time. Forty to sixty-five years underground or under concrete is long enough for a few specific failure modes to show up. Soil chemistry around the pipe, trace minerals in the concrete itself, and the electrical potential created when copper sits near steel rebar in the slab all contribute to a slow process called electrolysis, which pits the outside of the pipe wall from the exterior rather than the interior. Unlike the scale buildup hard water causes inside a pipe, which we cover in our guide to hard water in Ventura County, slab leak corrosion usually starts from the outside in, which is part of why these leaks are hard to predict from a visible symptom alone.
Water pressure makes every one of these failure modes worse. California's plumbing code caps static water pressure at 80 psi at the point it enters a home, and homes on elevated lots or on older, unregulated service lines sometimes run well above that without anyone noticing until something fails. A pinhole that might have wept slowly at 60 psi can turn into a steady leak at 95 psi. Checking static pressure and installing a pressure-reducing valve where needed is one of the first things we do on any slab leak call, because fixing one pinhole while leaving the pressure that caused it unaddressed just buys time until the next one.
The signs that usually bring someone to call
- A warm or damp spot on an otherwise cool slab floor, often over or near a hot water line, noticeable through tile or hardwood more than carpet.
- A water heater or boiler that seems to run constantly without the household using more hot water than usual, because it's fighting to keep up with water being lost in the wall or under the floor.
- A water bill that jumps noticeably with no corresponding change in household use. A continuously running hot water line leak can waste hundreds of gallons a week without ever surfacing as visible water.
- The sound of running water when every fixture is off, or a water meter that keeps spinning during a simple shutoff test: close the main, watch the meter, and if it still moves, something downstream is leaking.
- Cracking in the slab or nearby drywall, mildew smell with no visible source, or a soft spot in flooring, each a sign that water has been present long enough to affect the structure around it.
How we actually find it
The process starts with isolating which system is leaking. Shutting off the main and watching the meter tells us whether it's a pressurized supply line, which leaks continuously, or a drain line, which only shows symptoms when the fixture is used. That distinction changes everything about how we proceed, and it's a five-minute test that rules out a lot of guesswork before any equipment comes out.
For a confirmed supply line leak, acoustic listening equipment comes first. A ground microphone or listening disc amplifies the distinct sound of water escaping a pressurized line, a sound that travels through concrete and soil differently than ambient noise, and an experienced ear can triangulate a rough location by comparing volume at several points along the suspected run. We follow that with an electronic pipe locator, which traces the actual physical path of the line under the slab using a transmitter and receiver, since the plumbing doesn't always run in a straight line between fixtures the way a floor plan might suggest.
When a leak is quiet, deep, or under flooring that muffles sound, like thick tile set in a heavy mortar bed, we move to tracer gas. The water line is drained, pressurized instead with a safe mix of hydrogen and nitrogen, and a handheld sensor walks the suspected path above the slab, detecting gas as it escapes through the same hole the water was using and migrates up through the concrete. It's sensitive enough to find a hole smaller than a pinhole, and it works in situations where acoustic methods alone struggle, including on the flatter, higher-water-table lots toward Oxnard where saturated ground changes how sound and pressure behave underground.
Acoustic and tracer-gas results get cross-checked against each other, and against the pipe locator's path, before we mark a cut. A six-inch access hole in the right spot does the same job as a demolished floor; the accuracy of the detection is what makes that possible.

The same crew handles detection, access, and repair, so nothing gets handed off between separate companies.
What repair actually looks like, once we know where to cut
Finding the leak is most of the hard part. The repair itself usually comes down to three approaches, and which one makes sense depends on the pipe's age, how many leaks it's had, and what's practical for the specific slab.
- Spot repair. A small, targeted section of slab is cut, usually one to two square feet, the damaged section of pipe is removed, and a new section is soldered or press-fitted in. This is the least invasive and least expensive option for a single, isolated leak in a line that's otherwise sound. Permitted work goes through the local building department, and we handle that paperwork.
- Reroute. Rather than repairing the line under the slab again, we abandon that section in place and run a new line overhead through the attic or down through an exterior wall instead. This avoids opening the slab at all and is often the better call once a line has leaked more than once, since it takes the remaining under-slab pipe out of service entirely for that fixture.
- Full repipe. If a home is on its second or third slab leak within a short span, that's usually a sign the whole system of pipe, not just one spot, is reaching end of life. At that point we talk through a complete repipe in copper or PEX, which costs more up front but stops the pattern of repeated slab cuts. We cover the fuller decision between a one-off repair and a whole-home repipe in our pipe repair and repiping guide.
| Scope of work | Typical cost | Best fit |
|---|---|---|
| Leak detection (acoustic + tracer gas) | $250–$500 | Usually credited toward the repair if we do both |
| Spot repair through a small slab cut | $900–$2,500 | A single, isolated pinhole leak in an otherwise sound line |
| Reroute above or around the slab | $1,800–$4,000 | A line that's leaked before, or where cutting the slab is impractical |
| Full repipe, single-story home | $6,000–$12,000 | Multiple slab leaks on the same original plumbing system |
Every one of these ranges assumes a straightforward residential slab. Commercial buildings, multi-story construction, and homes with finished flooring that needs to be matched and restored after a cut all shift the number, which is why we quote off an actual site visit rather than a number over the phone.
A warm spot in a hallway, found and fixed in one visit
A homeowner in a 1974 single-story home near Montalvo noticed a warm patch in the hallway tile and a water bill that had crept up over two months with nothing else to explain it. We confirmed a supply-side leak with the meter test, narrowed it with acoustic listening to a six-foot section of hallway, then used tracer gas to pinpoint the exact spot: a pinhole at a soldered joint under the tile. The access cut was under two square feet, the joint was replaced the same afternoon, and the tile was patched to match. Total time from arrival to a dry slab was about four hours.
Illustrative example. Specific outcomes vary based on existing infrastructure and site conditions. Prior results do not guarantee similar outcomes.
The bottom line
A slab leak sounds like a worst-case plumbing problem, and in homes with original 1960s-to-80s copper, it's a realistic thing to plan for eventually rather than a freak accident. But the fix doesn't have to match the fear. Acoustic listening, electronic line tracing, and tracer gas together usually narrow a leak to a small, specific spot before any concrete gets cut, and most repairs are a targeted patch rather than a demolished room. The two things actually worth doing proactively are keeping static pressure under the 80 psi code ceiling and getting a slab leak looked at within days of noticing the signs, not months, since a hot line leak running unnoticed under a floor costs more in water and potential damage the longer it goes.
If you've got a warm spot, a water bill that doesn't make sense, or a water heater that won't stop cycling, call us before you start planning around a jackhammer. We bring the detection equipment on the first visit.